31 July 2009

Oh Baby

Are you loving the Oh Baby series??


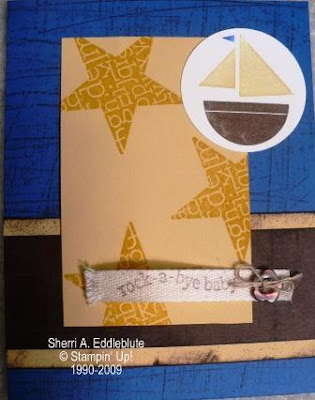
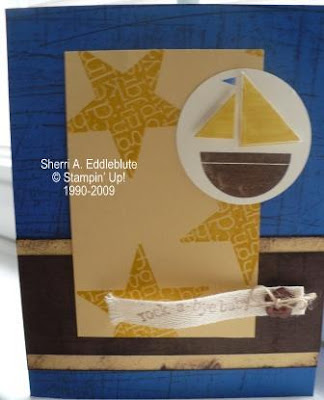
As I flip through the new catalog a majority of the samples show distressed images, panels with color spatter from the color spritzer tool, and twill tape. I used all three elements on todays card.


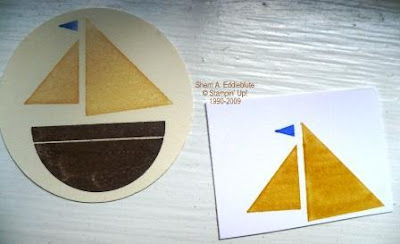
This baby boy card started with Brillant Blue cardstock, stamped with Sanded background in Chocolate Chip. The So Saffron horizontal piece was sponged and color spritzed with Chocolate Chip. Chocolate Chip direct-to-paper was ran along the Chocolate Chip horizontal piece. The alphabet star was stamped in Crushed Curry on So Saffron. The sailboat was stamped on very vanilla and cut out with a 1-3/4” circle punch.


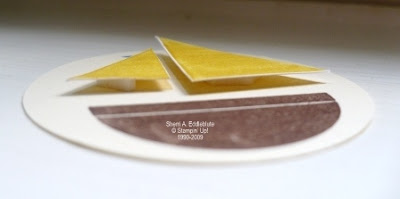
The two sails were stamped again on scrap paper and cut out, raised on dimensionals. I also decided I wanted brigter sails, so when I stamped on scrap paper, I used Crushed Curry.
Here's a side shot to see the raised sails!

Rock-a-bye baby was stamped on the twill tape. A Chocolate Chip button from Button Latte was threaded and tied with Linen Thread. I purposely started the twill to start fraying.


Sweet Deets (all supplies Stampin' Up!):
Stamps: Nursery Necessities, Sanded
Ink: Brillant Blue, Chocolate Chip, Crushed Curry
CS: Brillant Blue, Chocolate Chip, So Saffron, Very Vanilla
Accessories: Twill Tape, Button Latte, Linen Thread, Dimenisonals, Color Spritzer, Chocolate Chip marker


30 July 2009

Dry Embossing

A sweet simple card today. Sentiment to be added when I'm ready to send it. Maybe a small oval ontop of the ribbon left of the image.


Sweet Deets (all supplies Stampin' Up!):
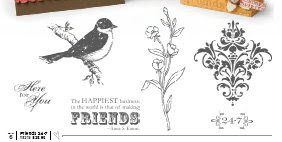
Stamps: Friends 24-7
Ink: Staz-On
CS: Basic Black, Pretty in Pink, Whisper White
Accessories: Markers, Big Shot Final Press embossing folder, 5/8" Organza Ribbon.


28 July 2009

Trio Butterflies

Rock and Roll was a technique featured in the old catalog and technique flyers. I used rock and roll for the center butterfly. Always work lightest to darkest so you don’t ruin your pads or markers! I inked up the stamp with Crushed Curry and then rocked it in the Rich Razzleberry.
The other butterflies are two-step stamps. I used Barely Banana and Crushed Curry and Pale Plum and Rich Razzleberry. The butterflies were quickly punched out with the NEW butterfly punch. They were then placed on an oversized square and then on three strips of Razzleberry Lemonade DSP panels.
I’ve placed my greeting inside the card.

Enjoy the flight.

Sweet Deets (all supplies Stampin' Up!):
Stamps: Flight of the Butterfly
Ink: Barely Banana, Crushed Curry, Palm Plum, Rich Razzleberry
DSP: Razzleberry Lemonade
CS: Crushed Curry, Rich Razzleberry
Accessories: Butterfly Punch

27 July 2009

Pick A Petal

Here's another QUICK Pick A Petal card. This one is heading to CA to cheer up my cousin. He's home from work with a certain H1N1 virus. Pick A Petal is a great set for funny faces!

Sweet Deets (all supplies Stampin' Up!):
Stamps: Pick A Petal
Ink: Ballet Blue
CS: Ballet Blue, Whisper White
Accessories: Hostess Patterns Pack DSP III

Side note, remember when I recommended writing the names of the colors of the DSP? (Of course you do!). I also recommend it with the hostess DSP packs. I write it right on the cover!

24 July 2009

Bag, Tag, Box (BTB)

HAPPY FRIDAY! Do you have a great weekend planned? We do!!!!! Fridays are FANTASTIC and a great day to unveil a new segment here at Sweetest Designs: Bag, Tag, Box!
I've got some great boxes and tags and bags in store for you. These are great for holidays, presents and shower gifts and centerpieces.

Best of all they're easily customized and ecomonical.

This is a Gable Box. It used one piece of card stock plus some for decorating. I used scraps (whisper white and suede for the focal image) and will not include that in the cost of the box. Kraft, black or white CS is about 19 cents per sheet, colored cardstock is about 23 cents per sheet. I used a about 8" of ribbon to secure the box closed (this is approx. 15 cents). Minimal amounts of sticky strip is needed! I'll guess I used 12" or 25 cents worth of adhesive. TOTAL COST OF BOX: 59 cents!

This box is quite sturdy and great trendy shape and design and very easy to measure, cut and fold.


I double stamped the butterfly and cut it out, bent it, and placed it ontop of the original image. Here's a side shot of the raised butterfly. The wide oval punch is perfect for shaping the handles! The tops are rounded with a corner rounder.

Sweet Deets (all supplies Stampin' Up!):
Stamps: Friends 24-7, Great Friend
Ink: Certainly Celery, Rich Razzleberry, Soft Suede
CS: Kraft, Soft Suede, Whisper White
Accessories: 1/2" polka dot grosgrain soft suede, corner rounder, wide oval punch

Photo tutorial here


22 July 2009

Oh Baby

Here’s a quick clean card today. I used the small star on Kraft to create a uniform background. I emphasized the focal panel by adding a wide Soft Suede border. The elephants are lined up perfectly using the Stamp-A-Ma-Jig. I created a banner and used Sahara Sand direct-to-paper.


Sweet Deets (all supplies Stampin' Up!):
Stamps: Nursery Necessities
CS: Kraft, Soft Suede, Whisper White
Ink: Close to Cocoa, Sahara Sand, Soft Suede
Accessories: 3/4" square punch for the banner end

21 July 2009

Razzle Dazzle wrapping

Remember this card?? I used the razzle dazzle stamp on plain tissue paper to wrap the shower gift! There's baking goodies inside the bowl!


Sweet Deets (all supplies Stampin' Up!):
Stamps: Razzle Dazzle
Ink: Not Quite Navy

Be creative today!

20 July 2009

Deal of the Week


DEAL OF THE WEEK: Very Vanilla Stylized Hodgepodge Hardware Kit for only $18.99. This regularly sells for $29.95. Sale ends 9:50 am MT on Monday, July 27,

Our Hodgepodge Hardware kits are an amazing value-each kit contains approximately 200pieces of hardware! It includes an assortment of holders and brads which you can use to create memorable gifts, cards, scrapbook pages, and handmade books.

Each kit contains the following (number of pieces is approximate):
Raised Dot Oval holders: 10
Small Rectangle holders: 10
Raised dot designer holder: 10
1" Circle holders: 10
Square holders: 10
1/2" Genuine holders: 10
3/8" Flower brads: 10
3/8" Star brads: 10
1/2" Flower brads: 10
Flowers ribbon slides: 10
3/16" brads: 100

18 July 2009

Medallion Time


I’m finally back with the medallion card. You can find the tutorial for the medallion here.
I earned Flight of the Butterfly as a FREE set several months ago (as demonstrators we earn FREE goodies all the time!!), but I never mounted or used it. The new butterfly punch fits perfectly with the Flight of the Butterfly set, so I decided it was time to put the set together. I used the butterfly for my focal image of the medallion. I stamped off once with the razzleberry ink for a more subdued look. I love kraft, not quite navy, and rich razzleberry together!

I HOPE TO SEE YOU TODAY AT THE OPEN SCRAP, 12-5 in Burke.
Sweet Deets (all supplies Stampin' Up!):
Stamps: Flight of the Butterfly
Ink: Not Quite Navy, Rich Razzleberry
CS: Kraft, Not Quite Navy, Rich Razzleberry, Whisper White
Accessories: Scallop edge punch


16 July 2009

Oh Baby


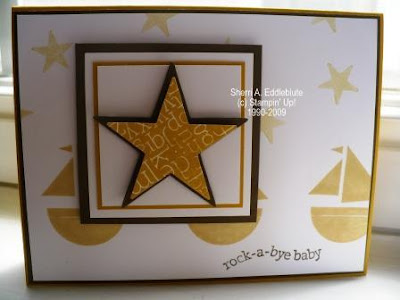
Another clean and simple baby card. I started with a whisper white panel and stamped the sailboats in So Saffron. I added the stars in So Saffron that had been stamped off once – for a lighter color. I stamped the alphabet star in Crushed Curry and cut it out with the large star punch. The Movers and Shapers star is slightly larger than the punch and creates a great layer in soft suede. Both stars are raised up on dimensionals. Interest is added on the squares by varying the border sizes. The soft suede square is also popped up on dimensionals. I think it’s a great unisex card by leaving the card yellow and brown.


Sweet Deets (all supplies Stampin' Up!):
Stamps: Nursery Necessities
Ink: Crushed Curry, So Saffron, Soft Suede
CS: Crushed Curry, Soft Suede, Whisper White
Accessories: Large star punch, mover and shaper (big shot) star


15 July 2009

Tearing, Faux Tearing, and Handmade Paper!

Hi stampers. Thanks for stopping by today.
I’ve got quick tutorials for ya!

1. Did you know there’s a wrong way to tear your paper? It’s not technically wrong, but it may not give you the results you were going for.
Does your paper look like this when you tear?In this photo I’m securing the paper with one hand (not shown) and pulling down with my other hand. Not so sweet.
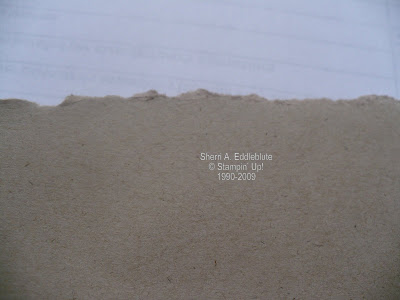

Let’s try again.
Doesn’t this look better? (Nod your head “Yes Sherri”)
You’ll have much more control over the paper when you hold it securely with both hands (mostly thumbs) and gently move both hands in an alternating tearing fashion. Tearing and sliding, tearing and sliding.


Phew, I know that sounds complicated, but grab that old envelope from the gas bill out of the garbage and try (unless the envelope is covered by something mysterious that came from your refrigerator and in that case, go find something to tear!).


2. Faux Handmade Paper
Have you seen the price of handmade paper? It brings an extra depth and texture to your projects but it’s quite expensive. Here’s a way to turn any cardstock into vintage or homemade!
Cut as desired
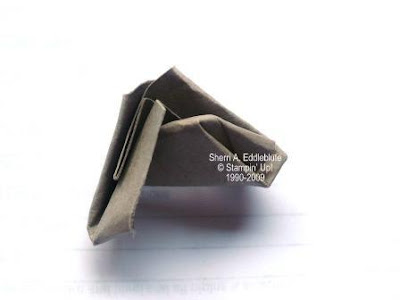


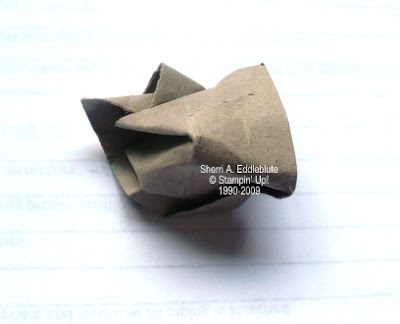
Start folding or crumbling it into a ball. No rhyme or reason. (Don’t mind the crappy white scratch paper, it’s a test report I should be reading! Don’t worry, I’ll get to it; eventually!)


Unfold. Not so glamorous, I know.

Make a ball again, unfold, again, unfold, again, unfold. Stop when you get the look you like.
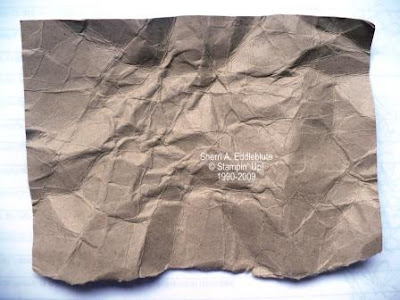
Here’s the end product.

Now if there’s too much going on for you – take a warm (WARM, NOT HOT) iron QUICKLY (I SAID QUICKLY) and run it over the paper once or twice to smooth things out. Please, oh please, don’t start a fire! Here’s is the ironed and unironed version. These started as the same size cardstock.

Moving on.
3. Faux tearing
Ok, I know we went over real tearing, but let’s say that’s not your style. You like the look, you just can’t bear the thought (what does that expression mean??) of tearing your beloved cardstock or DSP.

Start with your cardstock or DSP. Cut as desired.
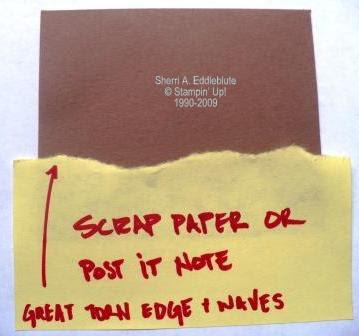
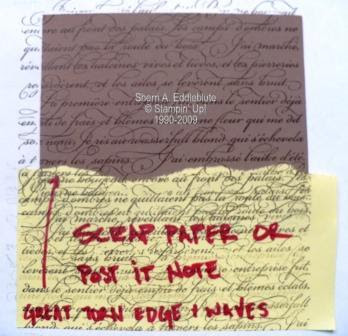
Make a tear on a scrap paper – maybe that gas bill envelope from above! I like using a post it note because it’s self securing. I tear the opposite side of the stickiness.
Place the real tear over the cardstock. Here the sticky end of the post it is closest to me.

Without moving anything, stamp. Here I’m showing you the post it note is securely under the stamp.
Again, without moving anything, pick up the stamp.

Now remember, I’m using a post it note, so I know the yellow scrap will not move. Gently slide up the cardstock. Make this straight or you’re waves will be sloppy. You can move it up as little or as much as you’d like (1/4” is what I’m eyeballing here).

For the next part, don’t peak until you’re finished.

Now take a dauber (a sponge will work just fine) and placing ink on the torn edge.
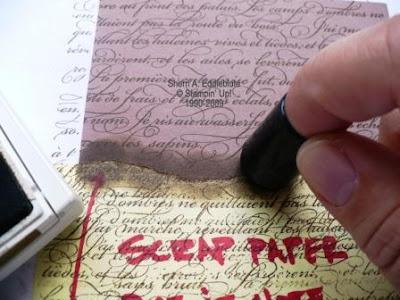
Focus on sponging the scrap paper edge and the cardstock will follow suit. DON’T PEAK until you’re finished.

Remove the scrap paper and viloa. (See what I did there? That’s a French word and I used fancy French script writing for my stamp!). There’s a method to my madness!

Stop back for a card with some tearing, faux homemade paper and faux tearing!

14 July 2009

RSVP's Requested


Would you drop me an email if you're coming on Saturday?? I'm trying to get a head count, and treats and a SURPRISE for attendees.

Thanks and have a great day!!
SHERRI

13 July 2009

Deal of the Week

A quick note, this weeks deal of the week are the SQUARE FIRE RHINESTONE BRADS, item # 109112 on page #179 of the NEW 2009-2010 IBC. Regular price $10.95, ON SALE for $6.99!

Sale ends Monday, July 20th at 9:50 AM Mountain Time!

Summer Color Challenge

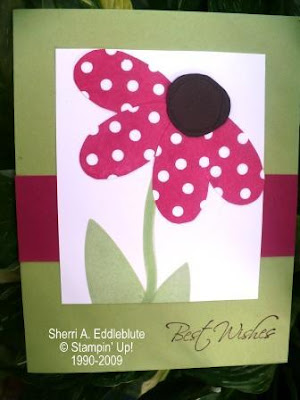
I received a color challenge via text Friday evening. And, will you allow me to tell you about my crap Friday evening?? I got home, we went to dinner, came home, just put on my sweats to chill on the balcony with an adult beverage and ring, ring, it's my boss. There was an emergency at work. I had to go back to work. It wasn't my weekend to cover - but no one else would answer their phones. Ok, let's get to the card! This is using the pick-a-petal set and look for more cards in the future with Pick A Petal!!

Thanks texter! Have a great Monday!!

Sweet Deets (all supplies Stampin' Up!):
Stamps: Pick a Petal, Kind & Caring Thoughts
Ink: Chocolate Chip, Certainly Celery, Rose Red
CS: Chocolate Chip, Certainly Celery, Rose Red, Whipser White

12 July 2009

It's Saturday Sketch Time, SSC107

I've been away for a couple of days. You'd think I haven't been stamping, but the exact opposite is true. I left GASC with great ideas and then I received my box of NEW NEW NEW product from the new catalog and I have been a busy stamping girl.


I had a difficult time with this weeks sketch challenge over at 411. Maybe I had too much new stuff and couldn't get started! Here's the sketch and my card.

After I inked up the damask stamp in melon mambo, I took my soft suede inked sponge and gently sponged the exterior of the image, I gave it a little huff and stamped it on whisper white. The new embosslit layers PERFECTLY with the wide oval punch. Because the big shot both cuts and embosses simultaneously, I used the direct-to-paper technique on the cut HI. The raised images picked up the soft suede ink. I tried using ribbon for the horizontal piece, but decided the eyelet border punch was a better choice.

Thanks for stopping by!!
Sweet Deets (all supplies Stampin' Up!):
Stamps: Friends 24-7
Ink: Melon Mambo, Soft Suede DSP: Thoroughly Modern
CS: Melon Mambo, Soft Suede, Whisper White
Accessories: Eyelet Border Punch, Stampin' Up Hi Embosslit, Wide Oval Punch


LinkWithin

Blog Widget by LinkWithin